Discover easy Easter chick craft ideas for a fun-filled holiday! Dive into our easy Easter chicken crafts for toddlers and preschoolers, ensuring the best easter crafts experience for little ones. Embrace the joy of spring with adorable baby chick crafts and creative Easter egg crafts. Explore Easter paper chick crafts that kids will love. Our ester craft ideas blend simplicity with creativity, making your Easter celebration truly special. So must try this spring craft.
Easter is a time for celebrating new beginnings and what better way to welcome the season than by crafting adorable Easter chicks with your kids?
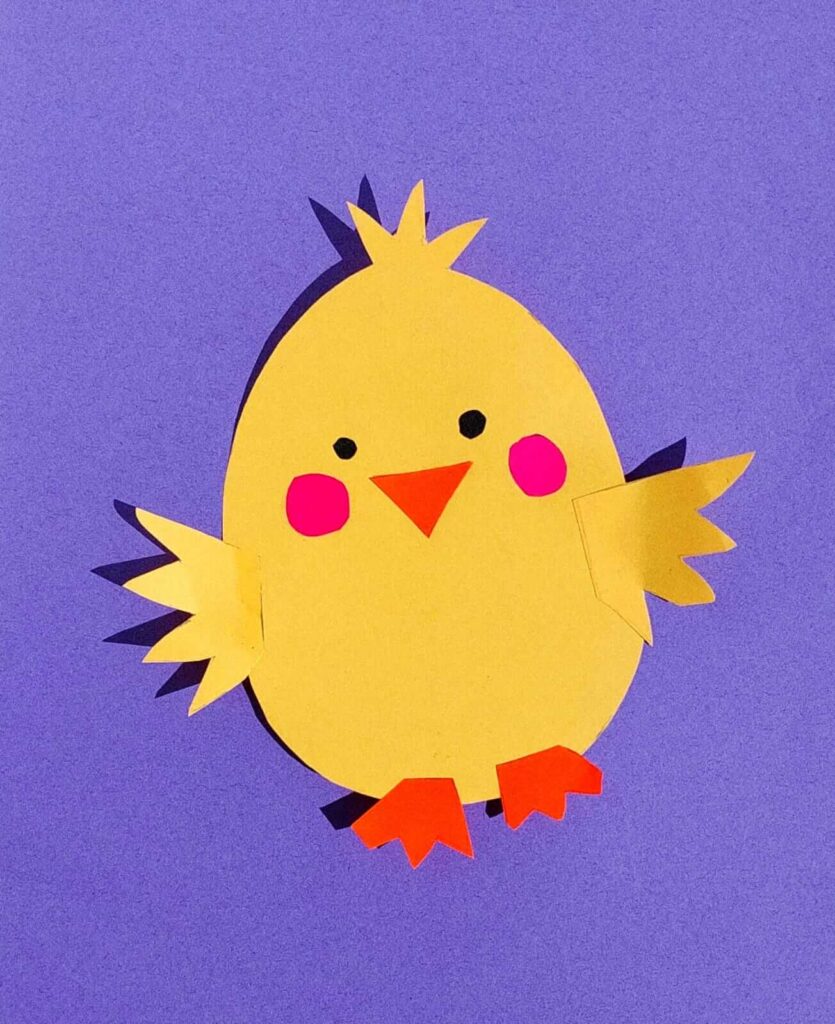
In this step-by-step guide, we’ll show you how to create charming paper Easter chicks that are not only fun to make but also perfect for decorating your home or giving as Easter gifts. Let’s dive into this creative and joyful project!
Easter Chick Craft: From Paper to Perfection

Materials You’ll Need
Before we get started, let’s gather the materials you’ll need to make these cute Easter chicks:
- Yellow Construction Paper: This will be the main color for your chicks.
- Orange Construction Paper: For the beaks and feet of the chicks.
- Googly Eyes (optional): These will add a playful touch to your chicks.
- Glue Stick: Use a child-friendly glue stick for easy application.
- Scissors: Child-safe scissors are ideal for young crafters.
- Markers or Crayons: For any additional coloring or details.
- Pencil: For drawing and tracing.
- Optional Decorations: You can add colorful feathers, ribbons, or stickers for extra flair.
With your materials ready, let’s embark on this delightful craft!
Crafting Steps
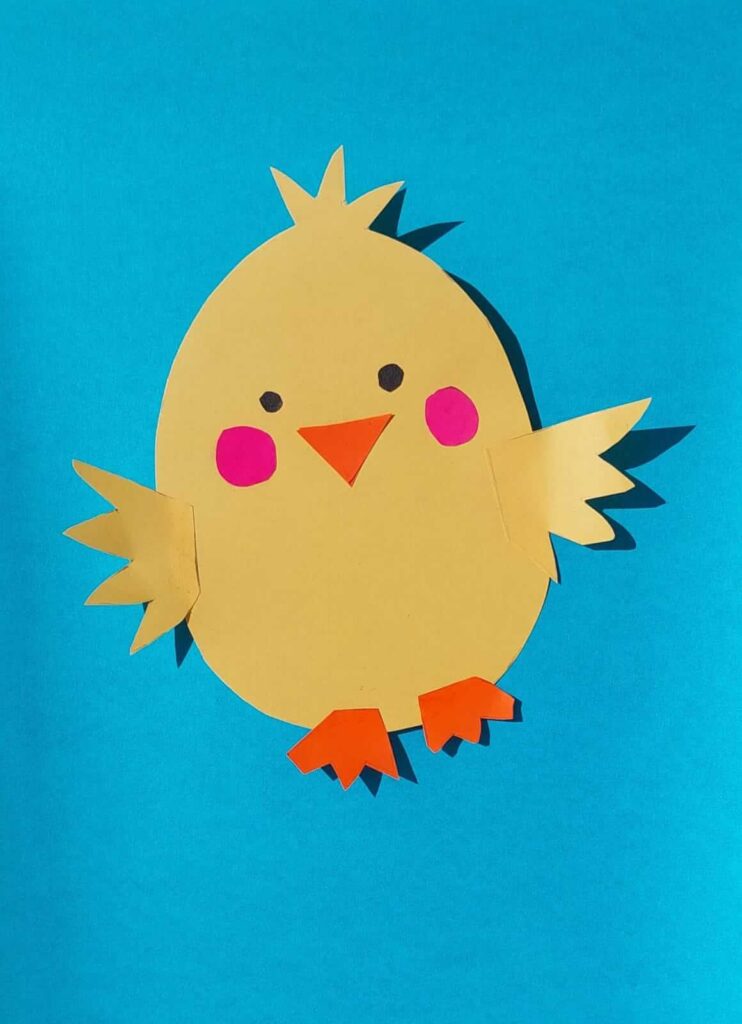
Step 1: Create the Chick’s Body
Take your yellow construction paper and cut out a large oval shape. This will be the chick’s body.
Feel free to get creative with the size of your chicks by cutting out different-sized ovals for variety.
Step 2: Add the Beak
From your orange construction paper, cut out small triangles for the beaks.
Glue the orange beak onto the top part of the oval body.
Step 3: Attach Googly Eyes
Glue googly eyes just above the beak. You can choose different-sized googly eyes for a playful look.
Let your child experiment with the placement of the eyes to give each chick its unique personality.
Step 4: Create Wings and Feet
Cut small wing shapes from the yellow paper and attach them to the sides of the oval body.
Cut tiny rectangles or feet design paper for the chick’s feet and glue them onto the bottom of the oval.
Step 5: Personalize Your Chicks
Now it’s time to add your personal touch. You can use markers or crayons to draw feathers, patterns, or colorful designs on the chick’s body.
Encourage your child to get creative and add their favorite colors.
Step 6: Optional Decorations
To make your Easter chicks even more special, consider adding colorful feathers, ribbons, or stickers to their bodies.
Let your child’s imagination run wild and decorate the chicks as they like.
Celebrate with Your Easter Chicks!
With your charming Easter chicks complete, you now have delightful decorations or cute Easter gifts.
These paper Easter chicks are a fantastic way to usher in the Easter season with creativity and joy.
Display them around your home, use them to adorn Easter baskets, or share them with family and friends.
It’s a craft that celebrates the spirit of Easter and the joy of crafting with your kids.
FAQ’s
1. How difficult is it to make Easter chicks with paper for kids?
Making paper Easter chicks is a relatively easy and enjoyable craft suitable for kids of various ages. It involves cutting, gluing, and decorating, making it accessible for young crafters.
2. What age group is this craft suitable for?
This craft is suitable for preschoolers and elementary-aged children, typically ranging from 3 to 10 years old. Older kids can enjoy it too and can add more intricate details to their chicks.
3. Where can I find the materials needed for this craft?
You can find the materials for making paper Easter chicks at most craft stores, or you can order them online. Basic supplies like construction paper, googly eyes, and glue sticks are readily available.
4. Can I customize the colors and decorations of the Easter chicks?
Absolutely! You can choose different colors for your chicks and let your child’s creativity shine by decorating them as they like. It’s a great opportunity for personalization.
5. Is adult supervision required for this craft?
Adult supervision is recommended, especially when using scissors, glue, and small parts like googly eyes. Younger children may need more guidance, while older kids can work more independently.
6. How long does it typically take to make one Easter chick?
The crafting time can vary depending on the child’s age, skill level, and level of detail added to the chick. On average, it may take 15-30 minutes to create one chick.
7. Can I use these paper Easter chicks as decorations for an Easter party?
Absolutely! These paper Easter chicks make charming decorations for Easter parties, egg hunts, or as table centerpieces. They can add a festive touch to any Easter celebration.
8. Are there other paper-based Easter crafts I can explore with kids?
Yes, there are plenty of paper-based Easter crafts to enjoy with kids, such as making Easter cards, paper Easter eggs, or even paper bunny ears. Get creative and explore various Easter-themed projects!